Trezor.io/start – Your Ultimate Guide to Secure Crypto Storage
Cryptocurrency is revolutionizing the world of finance, offering decentralized alternatives to traditional banking systems. But with the rise in popularity and adoption of digital assets like Bitcoin, Ethereum, and many others, the importance of secure storage solutions has never been more critical. This is where Trezor steps in—pioneering the world’s first hardware wallet. If you're new to Trezor or looking for guidance on setting it up, Trezor.io/start is your ultimate destination.
In this comprehensive guide, we’ll explore everything you need to know about Trezor hardware wallets, the setup process via Trezor.io/start, and tips for safely managing your crypto assets.
What Is Trezor?
Trezor is a hardware wallet developed by SatoshiLabs, a Czech Republic-based company founded in 2013. It was the first of its kind, created to give cryptocurrency users an offline, ultra-secure way to store their digital assets.
Unlike software wallets, which are constantly exposed to online threats like malware and phishing, Trezor stores your private keys in a physical device that never connects directly to the internet. This approach makes it significantly more difficult for hackers to gain unauthorized access to your crypto holdings.
Why Choose a Trezor Wallet?
Before we dive into Trezor.io/start, let’s briefly highlight why a Trezor wallet is a top choice among cryptocurrency investors:
- Enhanced Security: Trezor keeps your private keys offline, meaning even if your computer is compromised, your funds remain safe.
- User-Friendly Interface: Designed for beginners and experts alike, Trezor offers a smooth user experience with a straightforward setup process.
- Open-Source Technology: Trezor’s firmware and software are open-source, allowing for community review and transparency.
- Support for Multiple Cryptocurrencies: Trezor supports over 1,000 coins and tokens including Bitcoin, Ethereum, Litecoin, and many ERC-20 tokens.
- Recovery Options: If your Trezor is lost or stolen, you can recover your wallet using the recovery seed generated during the initial setup.
What Is Trezor.io/start?
The URL Trezor.io/start serves as the official setup portal for all Trezor hardware wallets. Whether you’ve purchased a Trezor Model One or the more advanced Trezor Model T, this page will guide you through each step of the setup process in a secure and intuitive manner.
This site is the first stop after unboxing your Trezor device. It ensures that you're downloading the official Trezor Suite software, installing firmware, and initializing your hardware wallet safely.
Trezor Hardware Models
Before heading to Trezor.io/start, it’s useful to know which model you own or plan to purchase. Here’s a quick comparison:
1. Trezor Model One
- Display: 128x64 pixel OLED screen
- Supported Coins: 1000+ including BTC, ETH, LTC
- Buttons: Two physical buttons
- Price: Affordable entry-level option
- Security: Robust but lacks advanced features like Shamir Backup
2. Trezor Model T
- Display: Full-color touchscreen
- Features: Advanced backup options (Shamir), MicroSD support
- Supported Coins: Wider range of tokens and altcoins
- Security: State-of-the-art protection
- Price: Higher, but offers premium features
Both models are supported by the same setup process via Trezor.io/start.
Step-by-Step Guide to Setting Up Your Trezor via Trezor.io/start
Setting up your Trezor hardware wallet is simple, especially when you follow the guidance on Trezor.io/start. Below is a breakdown of the entire process.
Step 1: Visit Trezor.io/start
Go to https://trezor.io/start in your web browser. Make sure you’re visiting the official site to avoid phishing scams.
Step 2: Download Trezor Suite
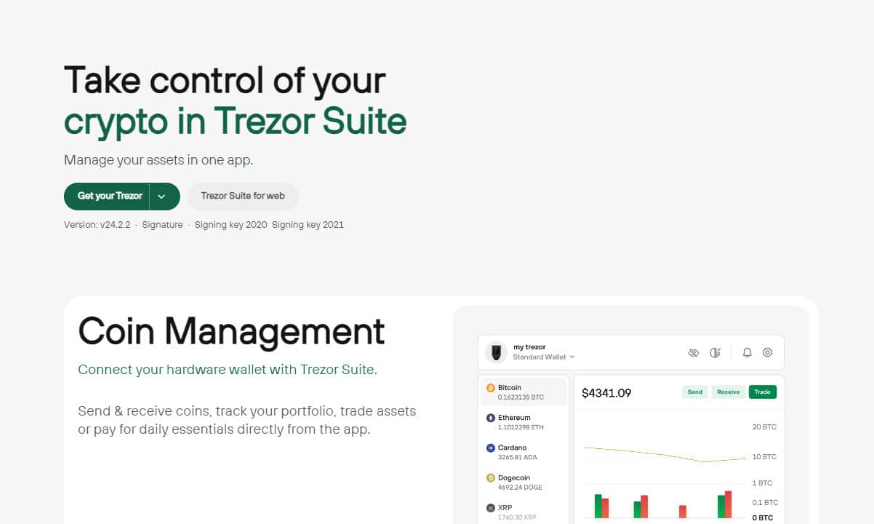
Trezor Suite is the official desktop app for managing your hardware wallet. It allows you to:
- Send and receive cryptocurrencies
- View your balance
- Access advanced settings
- Install updates and firmware
You can download Trezor Suite for Windows, macOS, and Linux.
Step 3: Connect Your Device
Plug your Trezor device into your computer using the included USB cable. The Trezor Suite will detect your device automatically. If this is your first time using it, you’ll be prompted to install firmware.
Step 4: Install Firmware
Trezor devices are shipped without pre-installed firmware to ensure security. The first action after connecting your wallet will be installing the latest firmware version. Follow the on-screen instructions carefully.
Step 5: Create a New Wallet
Once the firmware is installed, you can either create a new wallet or recover an existing one using a seed phrase. To create a new wallet:
- Click "Create Wallet"
- Choose "Standard seed backup" or "Shamir backup" (Model T only)
- Trezor will generate a 12 to 24-word recovery phrase
Step 6: Backup Your Recovery Seed
Your recovery seed is the most important component of your wallet. Write it down on paper and store it in a safe, offline location. Never take a screenshot or store it digitally.
Important: Anyone with access to your recovery seed can control your funds.
Step 7: Set a PIN
You’ll then be asked to set up a PIN to secure your device. This PIN will be required every time you use your Trezor.
Step 8: Start Using Your Wallet
Once your wallet is initialized and backed up, you're ready to send and receive cryptocurrencies securely. Use Trezor Suite to manage your portfolio with ease.
What You Can Do After Setup
Once your Trezor is ready via Trezor.io/start, you gain full control over your crypto journey. Here's what you can do:
- Manage Multiple Wallets: Set up different accounts for personal, business, or savings.
- Send and Receive Crypto: Enjoy fast and secure transactions using the Trezor Suite interface.
- Buy Crypto: Trezor Suite integrates with third-party exchanges, letting you purchase crypto directly.
- Use DApps: With integrations like MetaMask, you can access decentralized applications while keeping your keys offline.
- Enable Passphrase Protection: Add an additional layer of security with a custom passphrase.
Common Troubleshooting Tips for Trezor.io/start
Sometimes users encounter issues during setup. Here are a few common problems and solutions:
1. Trezor Not Detected
- Use a different USB port or cable
- Make sure Trezor Bridge or Trezor Suite is installed
- Restart your computer
2. Firmware Installation Fails
- Ensure internet connection is stable
- Try installing from a different computer
- Use the desktop version of Trezor Suite instead of the web interface
3. Recovery Seed Error
- Double-check spelling and word order
- Make sure you’re entering words from the BIP39 word list
If problems persist, visit https://trezor.io/support for assistance.
Security Best Practices
Setting up your Trezor via Trezor.io/start is just the beginning. Maintaining security is an ongoing process. Here are some tips:
- Never Share Your Seed Phrase: Not with friends, not online, not with anyone.
- Avoid Public Wi-Fi: When managing crypto, use secure, private internet connections.
- Enable Passphrase Protection: An optional passphrase adds an extra layer of encryption.
- Keep Software Updated: Always run the latest firmware and Trezor Suite version.
- Buy Only from Trusted Sources: Avoid third-party resellers or auction sites.
Frequently Asked Questions (FAQs)
Is Trezor.io/start safe to use?
Yes, it is the official setup page provided by Trezor. Always double-check the URL to avoid phishing websites.
Can I use Trezor with MetaMask?
Yes. Trezor integrates seamlessly with MetaMask, enabling you to use DeFi apps while keeping your private keys secure.
What happens if I lose my Trezor?
If you have your recovery seed backed up properly, you can restore your wallet on a new device.
Is Trezor better than software wallets?
While software wallets are convenient, Trezor offers unmatched security by keeping private keys offline.
Final Thoughts
In the world of cryptocurrency, security should be your top priority. With hacks and scams on the rise, using a reliable hardware wallet is essential. Trezor.io/start makes it incredibly easy to initialize your Trezor device and begin safeguarding your assets with peace of mind.
Whether you're a seasoned investor or new to crypto, following the steps outlined at Trezor.io/start ensures you're starting your journey on the right foot—with trust, transparency, and top-tier security.
So don’t wait. Head over to Trezor.io/start today and take control of your digital wealth—safely and securely.
Made in Typedream